Homemade Wine
I never thought I’d be making my own wine but I started learning about fermentation. Then one thing lead to another. And, before I knew it, I was purchasing everything I needed to make my first batch. But, I didn’t just make one, I made two and they both turned out beautifully. Thanks to the information on the web about Homemade Wine making, I felt confident enough to try. Now, I’m passing on what I’ve learned.

Making Homemade Wine “Must”
Sanitization is crucial when making homemade wine. Every tool and container used must be cleaned with a Food-Grade Sanitizer. Skipping this step is the most common rookie mistake. It often leads to months of effort ruined by wine turning into vinegar due to contamination. Just to be clear, you don’t need to go overboard. You don’t need a mask and rubber suit. It is essential, however, to rinse, wash, and spray anything that touches the wine with sanitizer. Doing so will ensure a clean, successful fermentation process.
The wine “Must” is easy to make. First determine how much wine you want to make. Decide what kind of fruit you want to use. Add 3 to 5 lbs of that fruit, per gallon(5 lbs for best results), to a food grade bucket. Then add the proper amount of water, sugar, yeast, a few other ingredients. This will guarantee a successful fermentation, putting you well on your way to creating your first batch of homemade wine.

Wine in the Primary stage
What Happens During the Primary Stage
The first week of making wine is called the Primary Stage. Approximately 80% of the fermentation of the wine is done during this time. It takes 5 to 6 days to complete. This stage is where the magic begins. Yeast interacts with the sugars in the fruit, creating alcohol and CO2. It’s critical to monitor the fermentation process closely. Temperature, oxygen exposure, and nutrient levels can greatly impact the wine’s quality. Proper preparation and maintenance set the foundation for great wine.
Preparing the Fruit and Sterilization
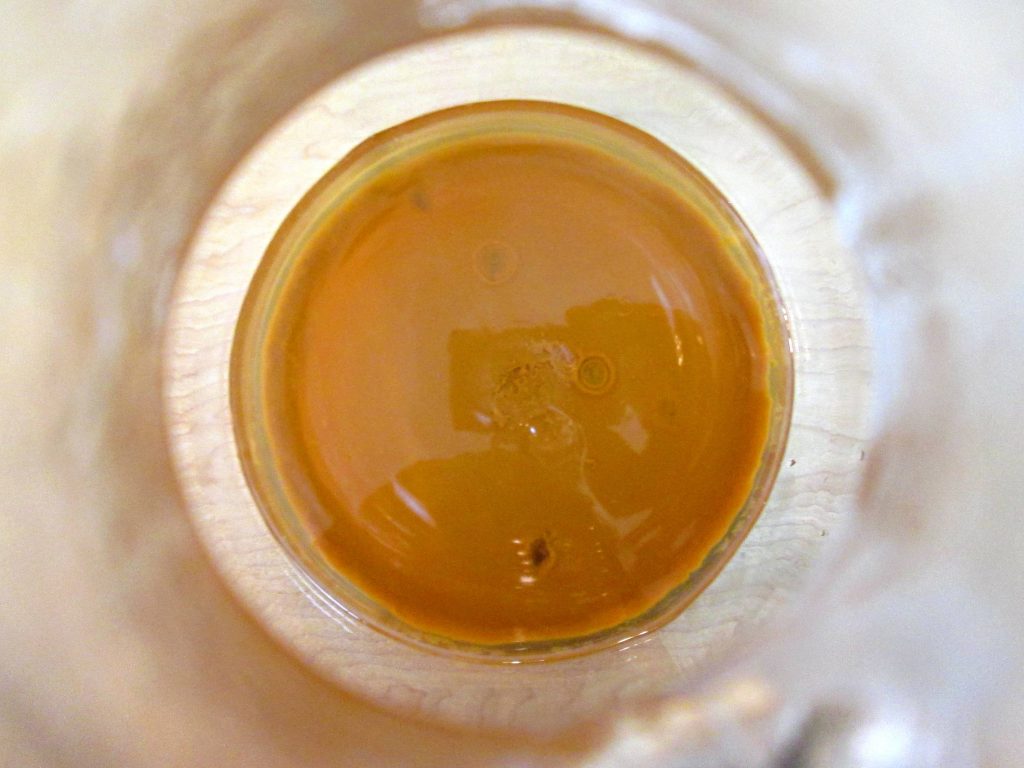
The first day is just a good soak of the smashed fruit and water mixed with a crushed Campden tablet. A Campden tablet is Metabisulflite. Sulfites are used to sterilize and preserve the wine. It also pulls the color from the peals of the grapes and colors the wine. You should also take a gravity reading with a hydrometer. Then you’ll be able to accurately calculate the ABV(Alcohol By Volume) percentage. I show you how to do this in the video tutorial. Homemade wine should be at least 12% to prevent spoilage. My wine usually hits 13%.
Adding Yeast and Necessary Additives
The second day is when the yeast is added. But not before first adding the Acid Blend, Pectic Enzyme and a Yeast Nutrient. Then you can “pitch” the yeast. These additives play essential roles in the wine-making process. Here’s how.
The Acid Blend ensures proper acidity for flavor balance and stability. Pectic Enzyme helps break down fruit cells, enhancing juice extraction and clarity. Yeast Nutrient provides necessary vitamins and minerals to ensure a vigorous fermentation. After mixing these in, the yeast kick-starts the primary fermentation, converting sugars into alcohol and releasing CO2. Stirring well at this stage ensures everything is evenly distributed for consistent results.
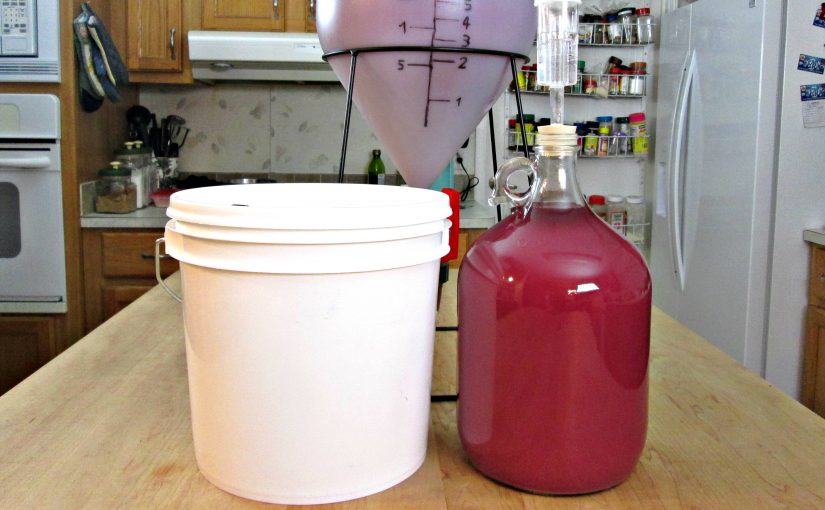
Choosing the Right Container
This whole process should be done in either a food grade bucket or Glass Carboy. The bucket should have a rubber gasket sealing lid and a plug and an air lock for a Carboy. Either will create an air tight container. An unsealed container will allow oxygen in and that can ruin the fermentation process.
Fermentation creates Co2 gas and it’s important that it’s released. So, understand the Primary stage of making wine, is in fact one of the most important stages during the months it takes to make Wine. The airlock will keep the oxygen out of your container and allow the Co2 that is being creating in the wine, to escape.
Daily Stirring and Monitoring
Each day after, for the next 3 to 4 days, the container needs to be opened and stirred. The fruit is usually at the top so, just a quick stir of the fruit, or “pomace”, will quickly release the Co2 build up in the Must and promote a healthy, even fermentation in the wine. Then, you simply seal the container back up and wait another 24 hours.
Moving to Secondary Fermentation
By the 5th or 6th day, the majority of the fermenting should be complete and should be ready to move into a secondary container. This is important because this separates the wine from the bulk of the fruit. Again 80% of the fermentation is done in the Primary Stage. That means the other 20% is done in the secondary.
Storing and Temperature Guidelines
I’ll show you how to rack and transfer the wine into a secondary in the next video and post. It is in this stage that you’ll only need to check the wine weekly. It’s important to keep the wine in a cool, dark place during both the primary and secondary stages. Maintain temperatures between 68° and 72° Fahrenheit for the best results. Each time you “rack”(transfer) the wine into another carboy or container, the wine will become more and more clear.
Keeping Notes and Tracking Progress
You’ll want to keep notes about each batch you make with dates, times and ingredients. I’m going to post my notes about this Primary Stage down below. This way you get a clear idea about what I’m talking about.
Check out my Peach Sangria Recipe, it’s incredible and my Berry Sangria is just as good. They both have classic similar ingredients, but different recipes entirely.
Recommendations
Wine Starter Kit, 5 Gal Carboy , Fast Fermenter, 1 Gal Carboy, Wine Bottles, Juicer Machine, Bentonite, Wine Syphon, Wine Filter.
How to Make Homemade Wine Part 2: The Secondary Stage of Wine Making
The Importance of the Secondary Stage
20% percent of the wine fermentation is done in the secondary stage. So, although it slows down considerably, it’s not any less important than the Primary stage. Maybe more so, in fact, because this is the part that takes the longest. It’s less work but you have to have more patience and trust that you’re turning out wine instead of vinegar. So take every necessary precaution along the way. Sanitation being among the most important.
Making sure everything seals properly is essential when making wine. Prioritize using functional tools like carboys, air locks, rubber gaskets, stoppers, and grommets to ensure airtight containment. Oxygen, getting in the container, will ruin the wine. Co2, not getting out, will carbonate your wine and turn it into champagne or worse, explode. So, take care of your equipment and be absolutely sure that everything you use is in top notch condition.
Transferring Wine to the Secondary Container
The secondary process is just simply removing the Homemade Wine from the primary stage container. Then transferring it into a secondary container; bucket, carboy or fermenter, for example. This separates the bulk of the fruit and most of the yeast sediment from the bottom of the bucket. The sediment will return again, however, in the secondary stage but that’s a good thing. Each time the sediment returns you’ll notice the wine it’s self will be getting clearer and more refined.
The last thing you want to do at this point is stir or shake your wine. Even if you have to pick up your carboy and move it, do so ever so gently. Siphoning and racking back into another secondary container is your best option at that point. Then sealing it back up and waiting another week or so for the wine to settle again.
Racking Frequency and Best Practices
Opinions greatly differ about how often wine should be racked, during the secondary stage. Some winemakers prefer to rack from the primary to the secondary container after 5 or 6 days. Then, leave it untouched for a month or more. Others advocate for racking weekly to keep the wine clear and free of sediment. Both methods have merit, and the choice often comes down to personal preference and desired results.
In my experience, racking 3 to 4 times throughout the process produces noticeably clearer wine. Ultimately, however, it’s really just a matter of time. While appearance remains consistent across different methods, flavor can be impacted.
Example:
I recently completed a Rosé and Chardonnay in just 35 days, racking weekly and even fining the wine before bottling. The results… a crisp, delicious wine my wife and I loved. And we’re excited to see how it develops with age over the next year.
UPDATE: Racking this many times isn’t necessary. It’s been 5 years since I wrote this post and have tried many different methods. The key is to remove the wine from the sediment once enough time has passed for it to settle completely.
Recommendations
Wine Starter Kit, 5 Gal Carboy , Fast Fermenter, 1 Gal Carboy, Wine Bottles, Juicer Machine, Bentonite, Wine Syphon, Wine Filter.
Noir Homemade Wine for 3 Gallons: Daily Notes & Activity
Like any good recipe, it’s important to write down and record your progress. If something goes wrong, you can back up, refer to your notes and, hopefully, diagnose the problem. It’s also good to look back on recipes you liked in order to re-produce the same results. Below is an example of my notes and the recipe I created for this wine, using Noir Grapes.
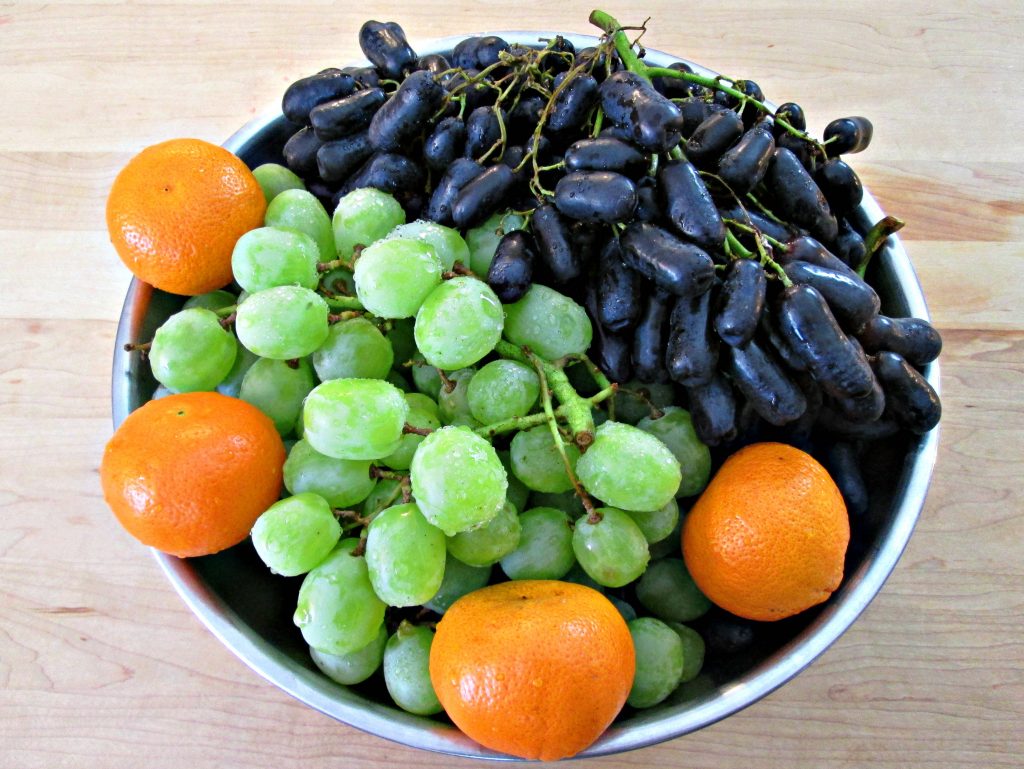
Preparing the Ingredients
- Day 1 Sep 26, 2019
- 7 lbs Black Seedless Noir Grapes
- 5 lbs Green Grapes
- 4 Mandarin Oranges
- 2 gal Water
- 1 Campden pill, crushed
- Stirred, covered with lid
- Resting 24 hr
Adjusting Gravity and Adding Yeast
- Day 2
- Gravity: 1.030
- Added Sugar, raised Gravity to 1.90
- 1 1/2 tsp Pectic Enzyme
- 1 tbsp 1 tsp Acid Blend
- 3 tsp Yeast Nutrient
- 1 pkg Yeast, 1/4 cup Hot Water, 1 tsp sugar
- Stirred, covered with lid and air lock
- Resting 24 hr
Daily Stirring Routine
- Day 3, 4, 5
- Stirred
Transitioning to Secondary Fermentation
- Day 6 October 1st
- Racked to Secondary’s.
- 1 gallon of wine in a glass carboy
- 8 liters of wine in fermenter
- Day 26 October 21st
- Racked only the carboy into another secondary
- Removed the Union on the Fermenter, dumped 1/2 yeast, then stirred to remove the 2nd half later.
- Sediment stuck to the bottom of the fermenter.
- Mixed 1 tsp Bentonite with 1/2 cup Hot water.
- Added 2 tbsp Bentonite slurry to the carboy and stirred.
- Waiting a few days.
Fining, Filtering, and Bottling
- Day 31 October 26th
- Racked to Secondary, Gravity: 0.99
- 1st Gravity: 1.090 2nd 0.99 = 13.12% ABV
- Added 1 crushed Campden Tablet
- 1/4 cup of Simple Syrup
- Potassium Sorbate
- Ready for Fining/filtering
- Racked Fermenter to 2 Secondary’s but the Settlement came with it.
- Waiting for 1 more week before clarifying.
Homemade Wine Kit, Tools, & Ingredients
I Bought a $55 dollar Starter Kit that includes everything you need to make several gallons of wine. 1 gallon of wine makes an average of 5 bottles of wine(750ml) so, you do the math. For the purpose of the Secondary Stage, I decided to buy a $45 dollar Fast Fermenter. Now I can demonstrate the perks of using one in the “Secondary Stage” video.
You can easily keep dumping money into a project like this. Especially if you want to turn your Homemade Wine into more of a professional product. However, if you’re only wanting to toy with it a few times, the starter kit is all you’ll ever need. For me it’s fun and easy to do. Plus the quality of the wine is shockingly good. I think you’ll understand soon enough.
With this wine-making series, you’ll have the knowledge and confidence to craft your own homemade wine with precision and skill. There is a few more steps to take though, so expect a few more videos about it. I have some interesting pointers to help you decide whether or not you want to try wine making your self.

How to Make Homemade Wine Part 3: Clarifying the Wine
Clarifying Homemade Wine is actually quite simple but there are a few steps to consider. The first is to continually rack the wine. This means transferring the wine from one bottle, or carboy, to another. I do it once a week and no more than 4 times before I consider fining or filtering the wine.
Another Way to Clarify Homemade Wine
The second clarifying technique for Homemade Wine is adding bentonite. Bentonite is a grey clay that sends an electromagnetic charge through the wine. It sticks and bonds to the molecules floating in the wine and pulls them down to the bottom. I usually add this after the 3rd racking of the wine. The 4th rack is to siphon off the bentonite. I add a crushed Campden pill to the wine, after. Also, potassium sorbate to sterilize and preserve the wine. This puts the yeast in a dormant state so it doesn’t reactivate or restart the fermenting process, when back sweetening.
Back Sweetening Homemade Wine
Back Sweetening is a simple process of sweetening the Homemade Wine after the whole fermentation process is complete. An easy way to do it is to add Simple Syrup. It is a 2 to 1 ratio of Sugar and boiled water. I add the recommended amount of potassium sorbate to the simple syrup before I add it to the wine. Then I stir in a 1/4 cup of the mixture at a time until I achieve my desired sweetness. At this point, your wine is technically complete and ready for the next steps.
You can choose to filter and refine the wine or move directly to bottling and corking, depending on your preferences. Fining is just a fancy term for filtering wine. If your wine is clear enough and you’re happy with it, go with it. Filtering or Fining, is the difference between a washed car or a waxed and polished car. If you catch my drift. It doesn’t, however, make the wine taste any better but it sure makes it look professional.
Recommendations
Wine Starter Kit, 5 Gal Carboy , Fast Fermenter, 1 Gal Carboy, Wine Bottles, Juicer Machine, Bentonite, Wine Syphon, Wine Filter.
Bottling and Storing Homemade Wine
If you’d like to learn how to Bottle and Store your wine, Click Here for the 4th installment. “How to make Wine Part 4: Bottling and Storing Wine” video and blog post tutorial.


2 thoughts on “How to Make Homemade Wine Part 1: The Primary Stage for Beginners”