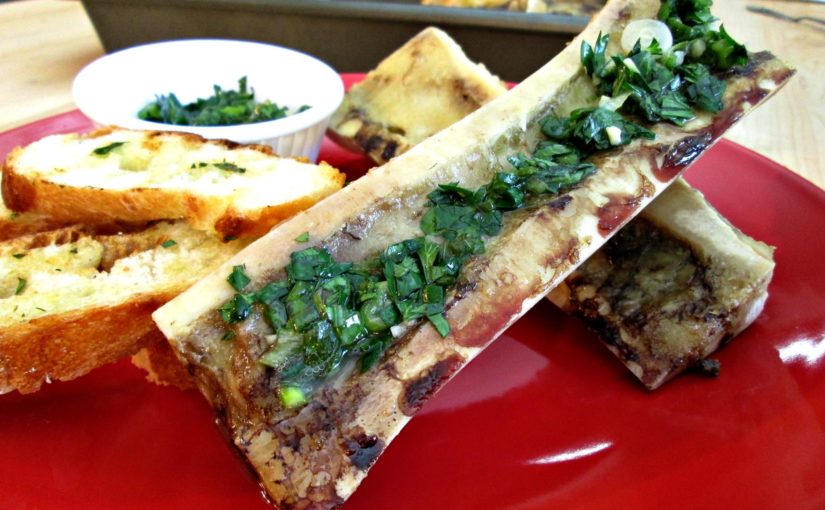
The Best Roasted Bone Marrow
If you’re a big fan of Roasted Bone Marrow, you’re in for a real treat because this dish can cost buku bucks in European and French restaurants. Doing it your self at home, however, can cost pennies on the dollar. So it’s well worth tucking some of that cash away, for a rainy day, and brushing up those skills in the kitchen. Not to mention, the flare and presentation of this dish is enough to impress anyone. So get comfortable and let me show you how it’s done.
Buying Bone Marrow
When you head off to the grocery store or to your local butcher, to buy Bone Marrow, you’re actually purchasing Beef or Lamb Bones(depending on where you live). For this recipe, I purchased Beef Bones but you can apply the same recipe and technique to Lamb if that’s what you’re using. I found that I can buy Beef Knuckle bones, frozen, at a fraction of the cost of the Long-shanks. The problem is, however, there isn’t as much bone marrow to be extracted and half of the bones didn’t have any to be removed at all. It’s better to buy these bones for Beef Bone Broth, which I will be showing you how to make in the next post. The Long-shanks were much meatier and had a lot more marrow to be extracted but the price difference between the two was tripled.
Cleaning Bone Marrow Bones
Bone Marrow is really easy to clean. In fact you don’t even have to do it if you want to just skip down to the next pic. No? Okay! Well, what you have to consider is that most butchers have a ton of meat to cut, literally, everyday. So, sometimes, the bones are left with a lot of scrap meat still attached to them. It’s not the worse thing in the world but it can be a little unsightly and scrappy looking if you’re serving this dish to someone you want to impress. All you have to do is tip the bones up on their ends, on a cutting board, and hack down the sides of the bone, scraping them clean. I highly recommend using a knife you don’t want to keep sharp because the bone will dull the blade, but it’s well worth doing if you like your bones clean.
The second Trick is soaking the bones in salt water. Most people recommend soaking them over night but the truth is, they’re usually clean in only 6 to 8 hours. You only need 1 teaspoon per cup of water and it doesn’t have to be an exact measurement, either, just close enough. I’m sure you’ll find that the bones look remarkable after a good soak and will appear to have been bleached.
Grilled Bone Marrow
You may have noticed that I Grilled these Roasted Bone Marrow Bones. They are just as easily prepared in the oven, if you prefer. I just like the flavor of the grill better for most meat recipes. Roasted Bone Marrow is a lot like butter or spread and if you think of it like unsalted or salted butter, you’ll know whether or not you should season your Marrow. Personally I think it’s practically flavorless without. But, because this recipe is best served on a baguette, I highly recommend that you try my Tomato and Basil Bruschetta or my Bruschetta with Roasted Peppers and Ricotta. Also, if the traditional salad topping, for the Bone Marrow, doesn’t sit well with you, I suggest you try my Chimichurri. Personally, I like it much better.
On a side note, like I mention in the video, Bone Marrow is often served with a shot of Whiskey. To make it fun, don’t just shoot the whiskey. Instead, after you’ve eaten the marrow, place one end of the bone in your mouth and hold the other end up, like a flute. Then poor the shot of whiskey into the middle of the high end, where the marrow use to be, and drink your shot.
Roasted Bone Marrow Ingredients:
1 French Baguette, sliced
8 to 10 lbs Beef Bones
2 qts Water
1/4 cup Salt
2 tbsp Olive
1 Lemon, squeezed
2 Green Onions, chopped
1 bunch Parsley, chopped
1 Garlic Clove, chopped
1 tsp Fish Sauce, optional
Salt and Pepper to taste
Grill or Roast Bones in the oven for 20 to 25 minutes at 375 degrees f.


