Here’s a Chipotle Chicken Recipe you’ll just love and use again and again. It’s tender, juicy and full of flavor. The spice can be adjusted according to your specific tastes. I’ve portioned out the heat to a medium kick so adjust accordingly by adding or subtracting Chipotle Peppers. I’m using canned Chipotle Peppers with Adobo sauce so the smokey taste will spread further. Marination isn’t necessary but it never hurts if you want to throw this in the refrigerator over night or for even just a half an hour. It’s up to you.
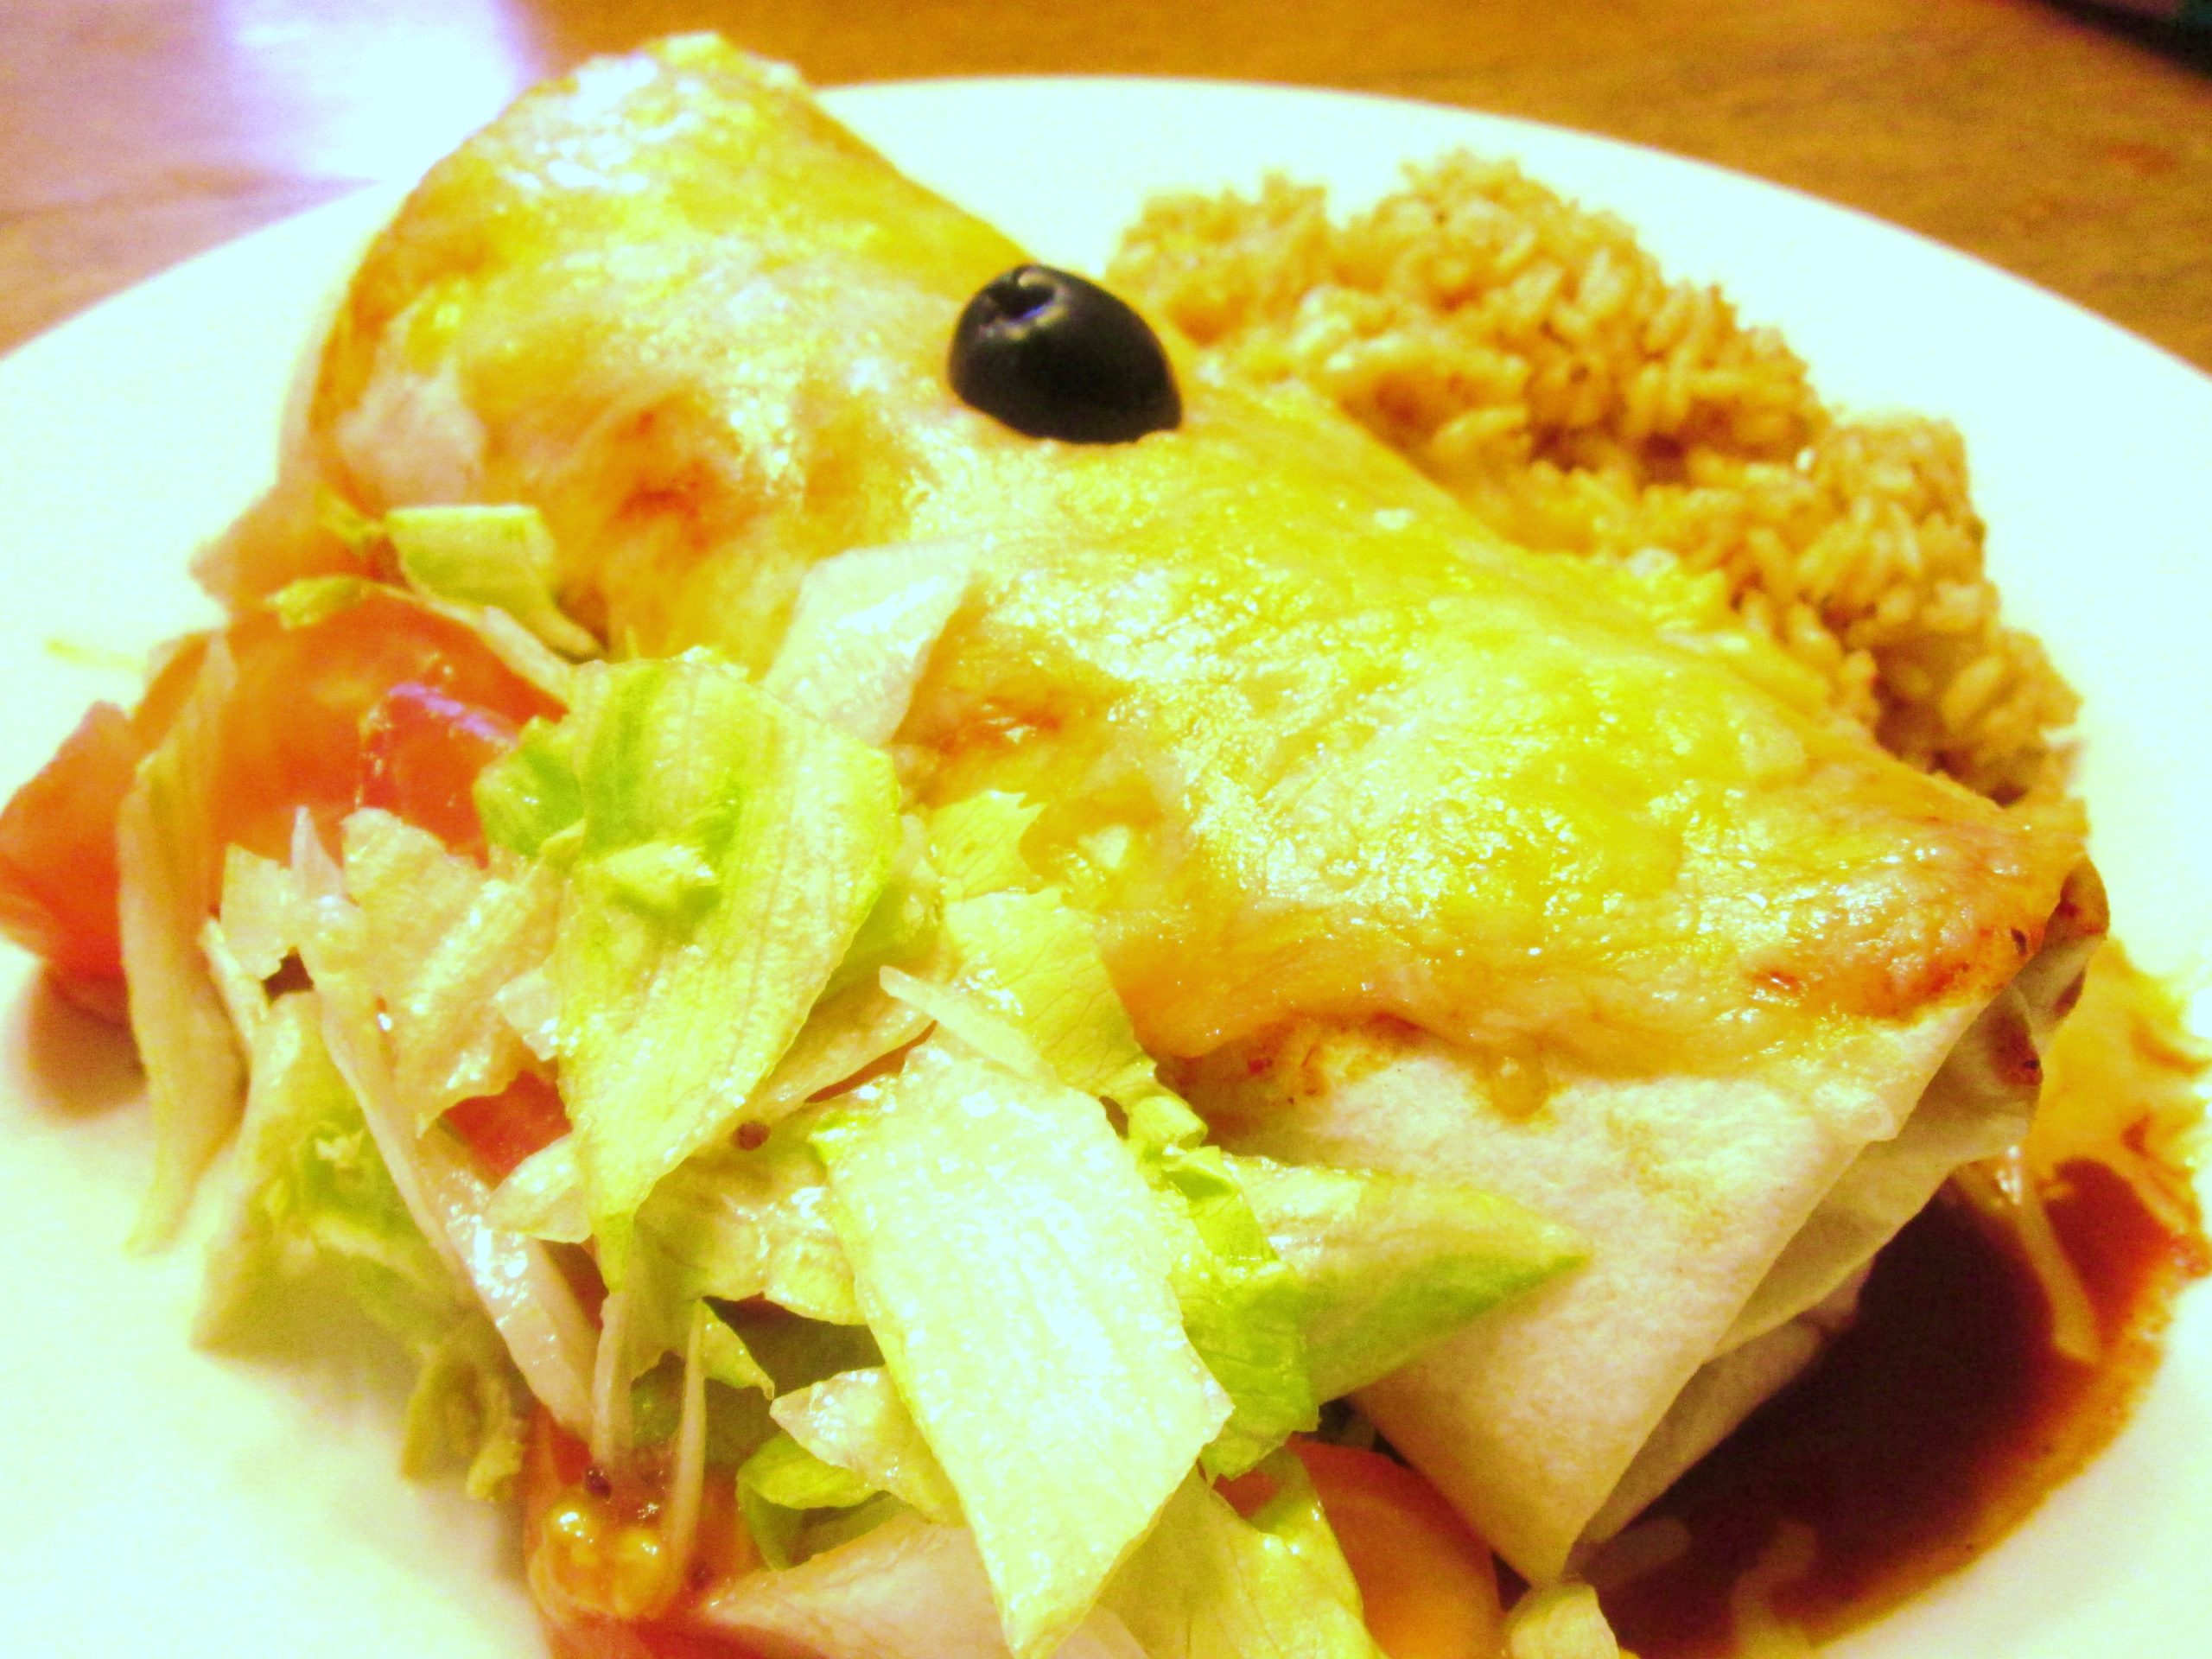
Chipotle Chicken for Tacos & Burrito’s
There are a ton of different ways to use this Chipotle Chicken recipe but my favorite way to put this meat to use is with street style tacos, like the photo above or in a burrito. I even like to have it in a rice bowl, with a lot of other veggies, Tex-Mex style. But if you want to go “fast food” with this Chipotle Chicken, I highly recommend loading a burrito, 7 Layer style, with all the works. I’m talking about rice, beans, cheese, guacamole, lettuce and sour cream. That’s one of my favorite ways to prepare this recipe, Chipotle style Taco Hell. 😉
My idea of a Bean and Cheese Burrito does not involve a Freezer and a Microwave. I fell in love with Mexican food the first time I ordered a #11 at our local Ricardo’s here in town. It was a classic Bean and Cheese Burrito the size of my plate, smothered in sauce and cheese, with a side of Spanish Rice and Beans. And then when I took my first bite, I literally thought I went to Mexican Heaven. I’m not entirely sure I ever came back either, because the list of recipes since then goes on ‘n on.
Now if you’ve had a Restaurant quality burrito, you know what I’m talking about. That’s what you want in your own home cooking, right? Well this is it. And in all honesty this recipe goes against everything I normally preach about, but I’m telling you, if you want that typical restaurant quality burrito, this is what you’ve gotta do. Buy Canned Mexican Pinto Beans and Enchilada Sauce. If you’ve got a good Enchilada Sauce recipe you like to use, then go with it, but you’d be surprised how many restaurants just use canned beans. The brands I normally use are Sun Vista, El Mexicano and Juanita’s. the great news is, most of these can be bought at any local grocer. The bad news is, most of those stores don’t sell Restaurant Quality flour tortillas. If you want to settle that’s fine. I use different tortillas all the time. But if you can find someone that makes fresh tortillas, like a Tortillaria, you’re going to improve your Bean and Cheese Burrito flavor by at least 50%!
Bean and Cheese Burrito Ingredients:
40 oz canned Pinto Beans
1/4 cup Enchilada Sauce
1/2 cup grated Mexican Cheese (Asiago, Jack, Cheddar, Quesadilla)
Large Flour Tortillas
Combine and cook the Beans and the Enchilada Sauce together and let it reduce half of the beans liquid; so make sure not to poor it out unless you want to get rid of the sodium, which is salty. Just be sure to replace the amount you poor out with water, but still reduce on the stove. Then add 1/4 cup of cheese to the inside of a large Flour Tortilla, then 1 cup of beans and roll up the burrito. Add 1 1/2 oz of Enchilada Sauce over the top of the burrito and cover with another 1/4 of cheese. Place in the oven under a high broil for approximately 1 minute, or until the cheese melts completely. Enjoy your Bean and Cheese Burrito with a side of my Spanish Rice and Salad.
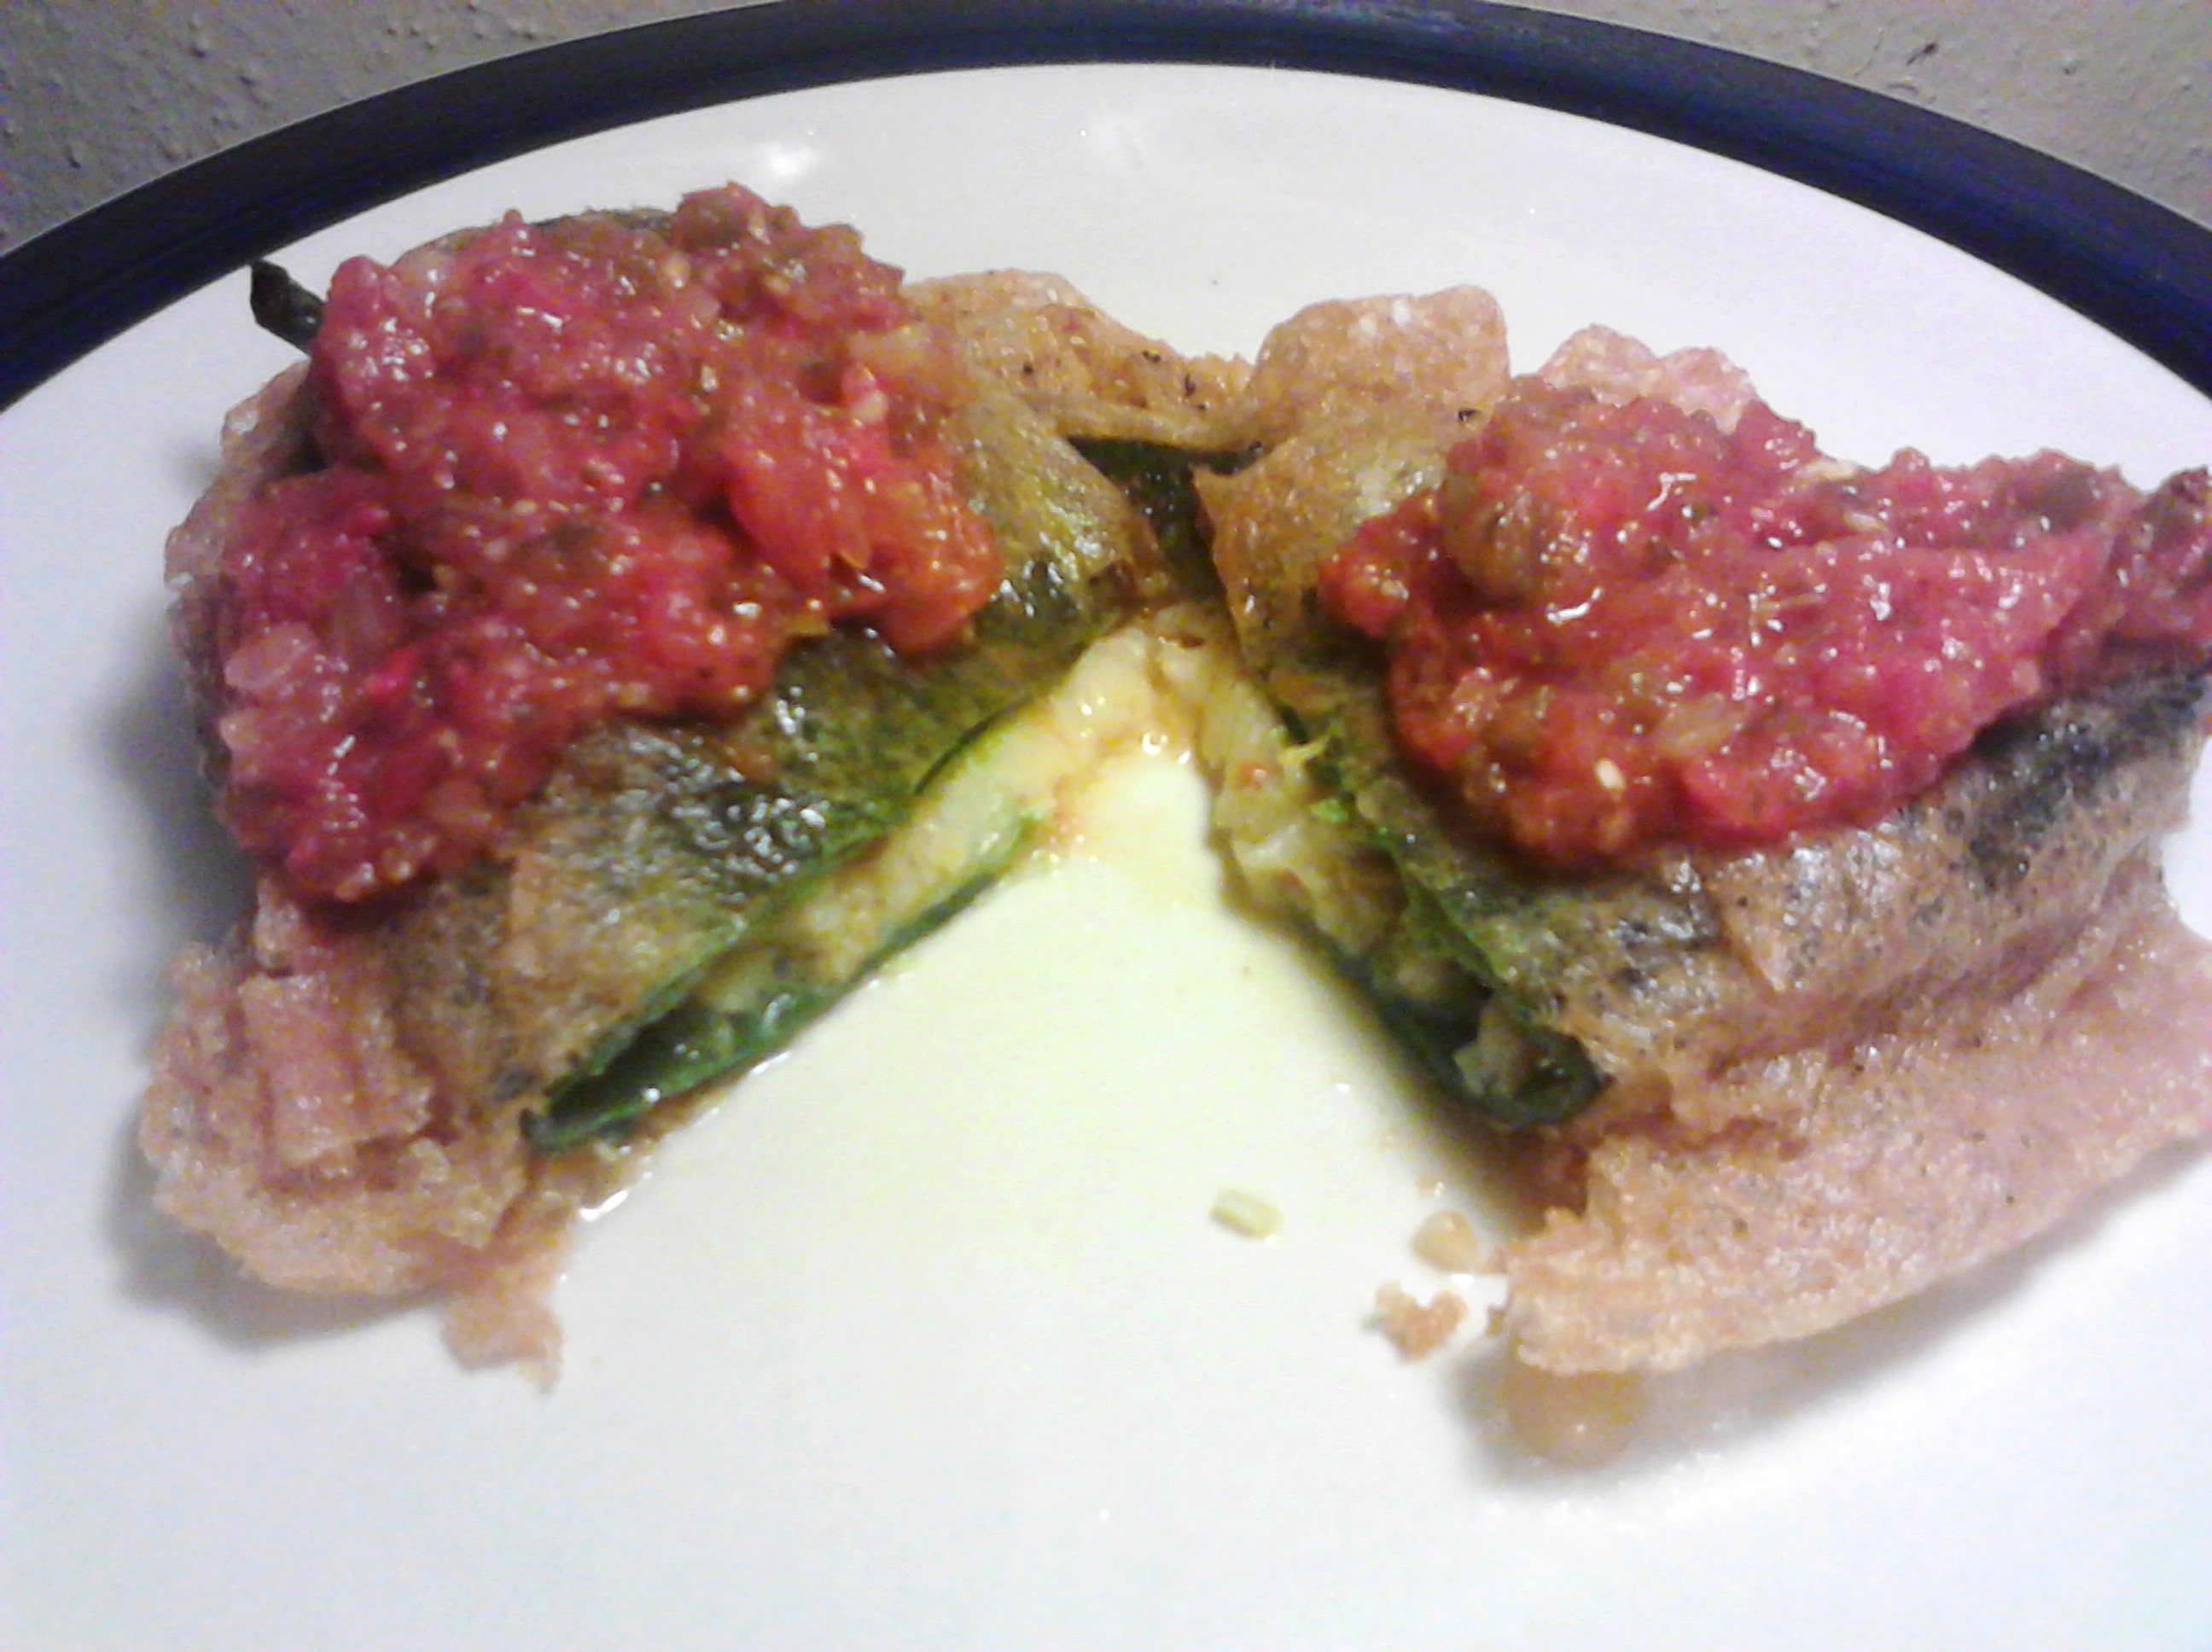
I’ll admit that my Chili Relleno Recipe can be a little bit tedious the way I like to make them, but they are most certainly well worth it. I like to stuff them with a lot more than just cheese which for me makes them taste so much better than just a battered chili. This recipe I use Spanish rice which I prepared just before I started broiling the chilies, but I believe you can stuff them with any of your favorite cooked meats.
This Chili Relleno Recipe requires just a few items that you can get from any regular grocery store. Of course the number one priority on your list should be some large green Chili’s. The only other item’s you’ll need is some jack cheese, eggs and some Spanish rice or your favorite meat. I think you could stuff these chilies with more vegetables if you like and they would be fantastic; maybe some spinach, or tomatoes, or even some sautéed zucchini; all of the above even. Get creative and don’t be scared about it. The best thing I think you can always do when you follow someone else’s basic “how to guide” with their personal take on a recipe is to take it with a grain of salt; meaning, you should realize that yes they may have some good experience cooking what they’re teaching about but what they are teaching is also based on their own personal tastes as well. So when it comes to any recipe you make, I strongly encourage people to improvise and throw in items that are personal favorites. I’m not saying you should get crazy and change out the seasonings and the overall preparation of the recipe, especially if you’ve never made anything like it before. I’m just saying that if you know for sure that you would possibly prefer vegetables over meat for example, then swap it out and go for it! Especially when it comes to this Chili Relleno Recipe Okay, enough said!
Chili Relleno Recipe steps and preparation
Now the best way to start any Chili Relleno Recipe is of course with your Chilies. Wash them, clean them and get them ready for a broil in the oven; or if you would like to take it a step further, throw them on a grill. It doesn’t matter really. You’re just going for the general desired color and texture of a fired cooked Chili. Just make sure which ever you decide, you give them a turn now and then to make the coloring even on every side. In the oven, I turn them every 2 minutes or so. After you’ve cooked them evenly, pull them out and throw a moist towel over them so the chili can soften up a bit. 5 to 10 minutes is all it will take. Then make a small incision in each one of the Chilies and stuff each one with only enough rice and cheese to be able to close back with a partial flap. This will ensure that there isn’t any spillage. At this point you can pull the seeds out as well if you’ve got your mind set on all of the tedious pet peeves of traditional authenticity, but if your not trying to impress the President of the United States, I’m pretty sure you can live without doing it. Traditionally you’re also suppose to peal the skins off at this point, then you roll them in flour and dip them into the egg mixture and fry. Just so we’re clear, I don’t peel skins. I think it’s pointless and it adds a chard effect to the flavoring of the Relleno.
When it comes to the egg mixture, you’re going need to separate the yokes from the whites, and blend the whites separately with a little bit of water and baking powder to make the eggs frothy. Then slowly add the yokes one at a time, all the while mixing the eggs on high speed. This is very important. The yokes have got to be very frothy and bubbly or the batter is going to run all over the place when you drop the chili in the fryer. All you have to do from here is dip and submerge one chili completely in the egg mixture ever so gently to ensure the flap doesn’t open and dump out the filling, then slowly add the chili to the hot oil in your fryer or your pan with oil. Oil in a pan doesn’t need to be more than one inch, and once you’ve browned one side just flip it over to the other and do the same. Then strain on to some paper towels and serve. Hope you enjoy my Chili Relleno Recipe!