Sushi Hand Roll

IMG_20131214_231355

Sushi, sushi, Sushi Hand roll!

Oh my god I love a Sushi Hand roll!  I’m not even playin’.  I honestly don’t remember the very first time it was really introduced in my life, but I do know for certain that it wasn’t something I grew up with.  I didn’t try Sushi until I was a grown man.  I’d even go a step further and say that I might have even been a grown drunk man.  This was late night food for me when I had the munchies.  At least that’s how I remember it.  In my mid twenties I picked up some work that was paying a lot of money; a lot of money for me anyway.  Plus I was single, and I was traveling to different jobs all the time, so I got to meet a ton of new faces that helped me pay out my ass with a ton of fresh experiences.  One of my favorites was a club in Denver called, “The Church”!

The Church was an old Cathedral, Roman Catholic style building that was turned into the hottest club in town.  Oh yeah, not to mention Sushi.  Crazy Right?  I’m telling you, nothing was a bigger surprise to me than to find a small Sushi bar in the very back of a 3 level floor, wall to wall, shoulder to shoulder college fest of drunken dancers.  However, in the condition I was in at 1:00 in the morning, NOTHING could’ve made me happier either.

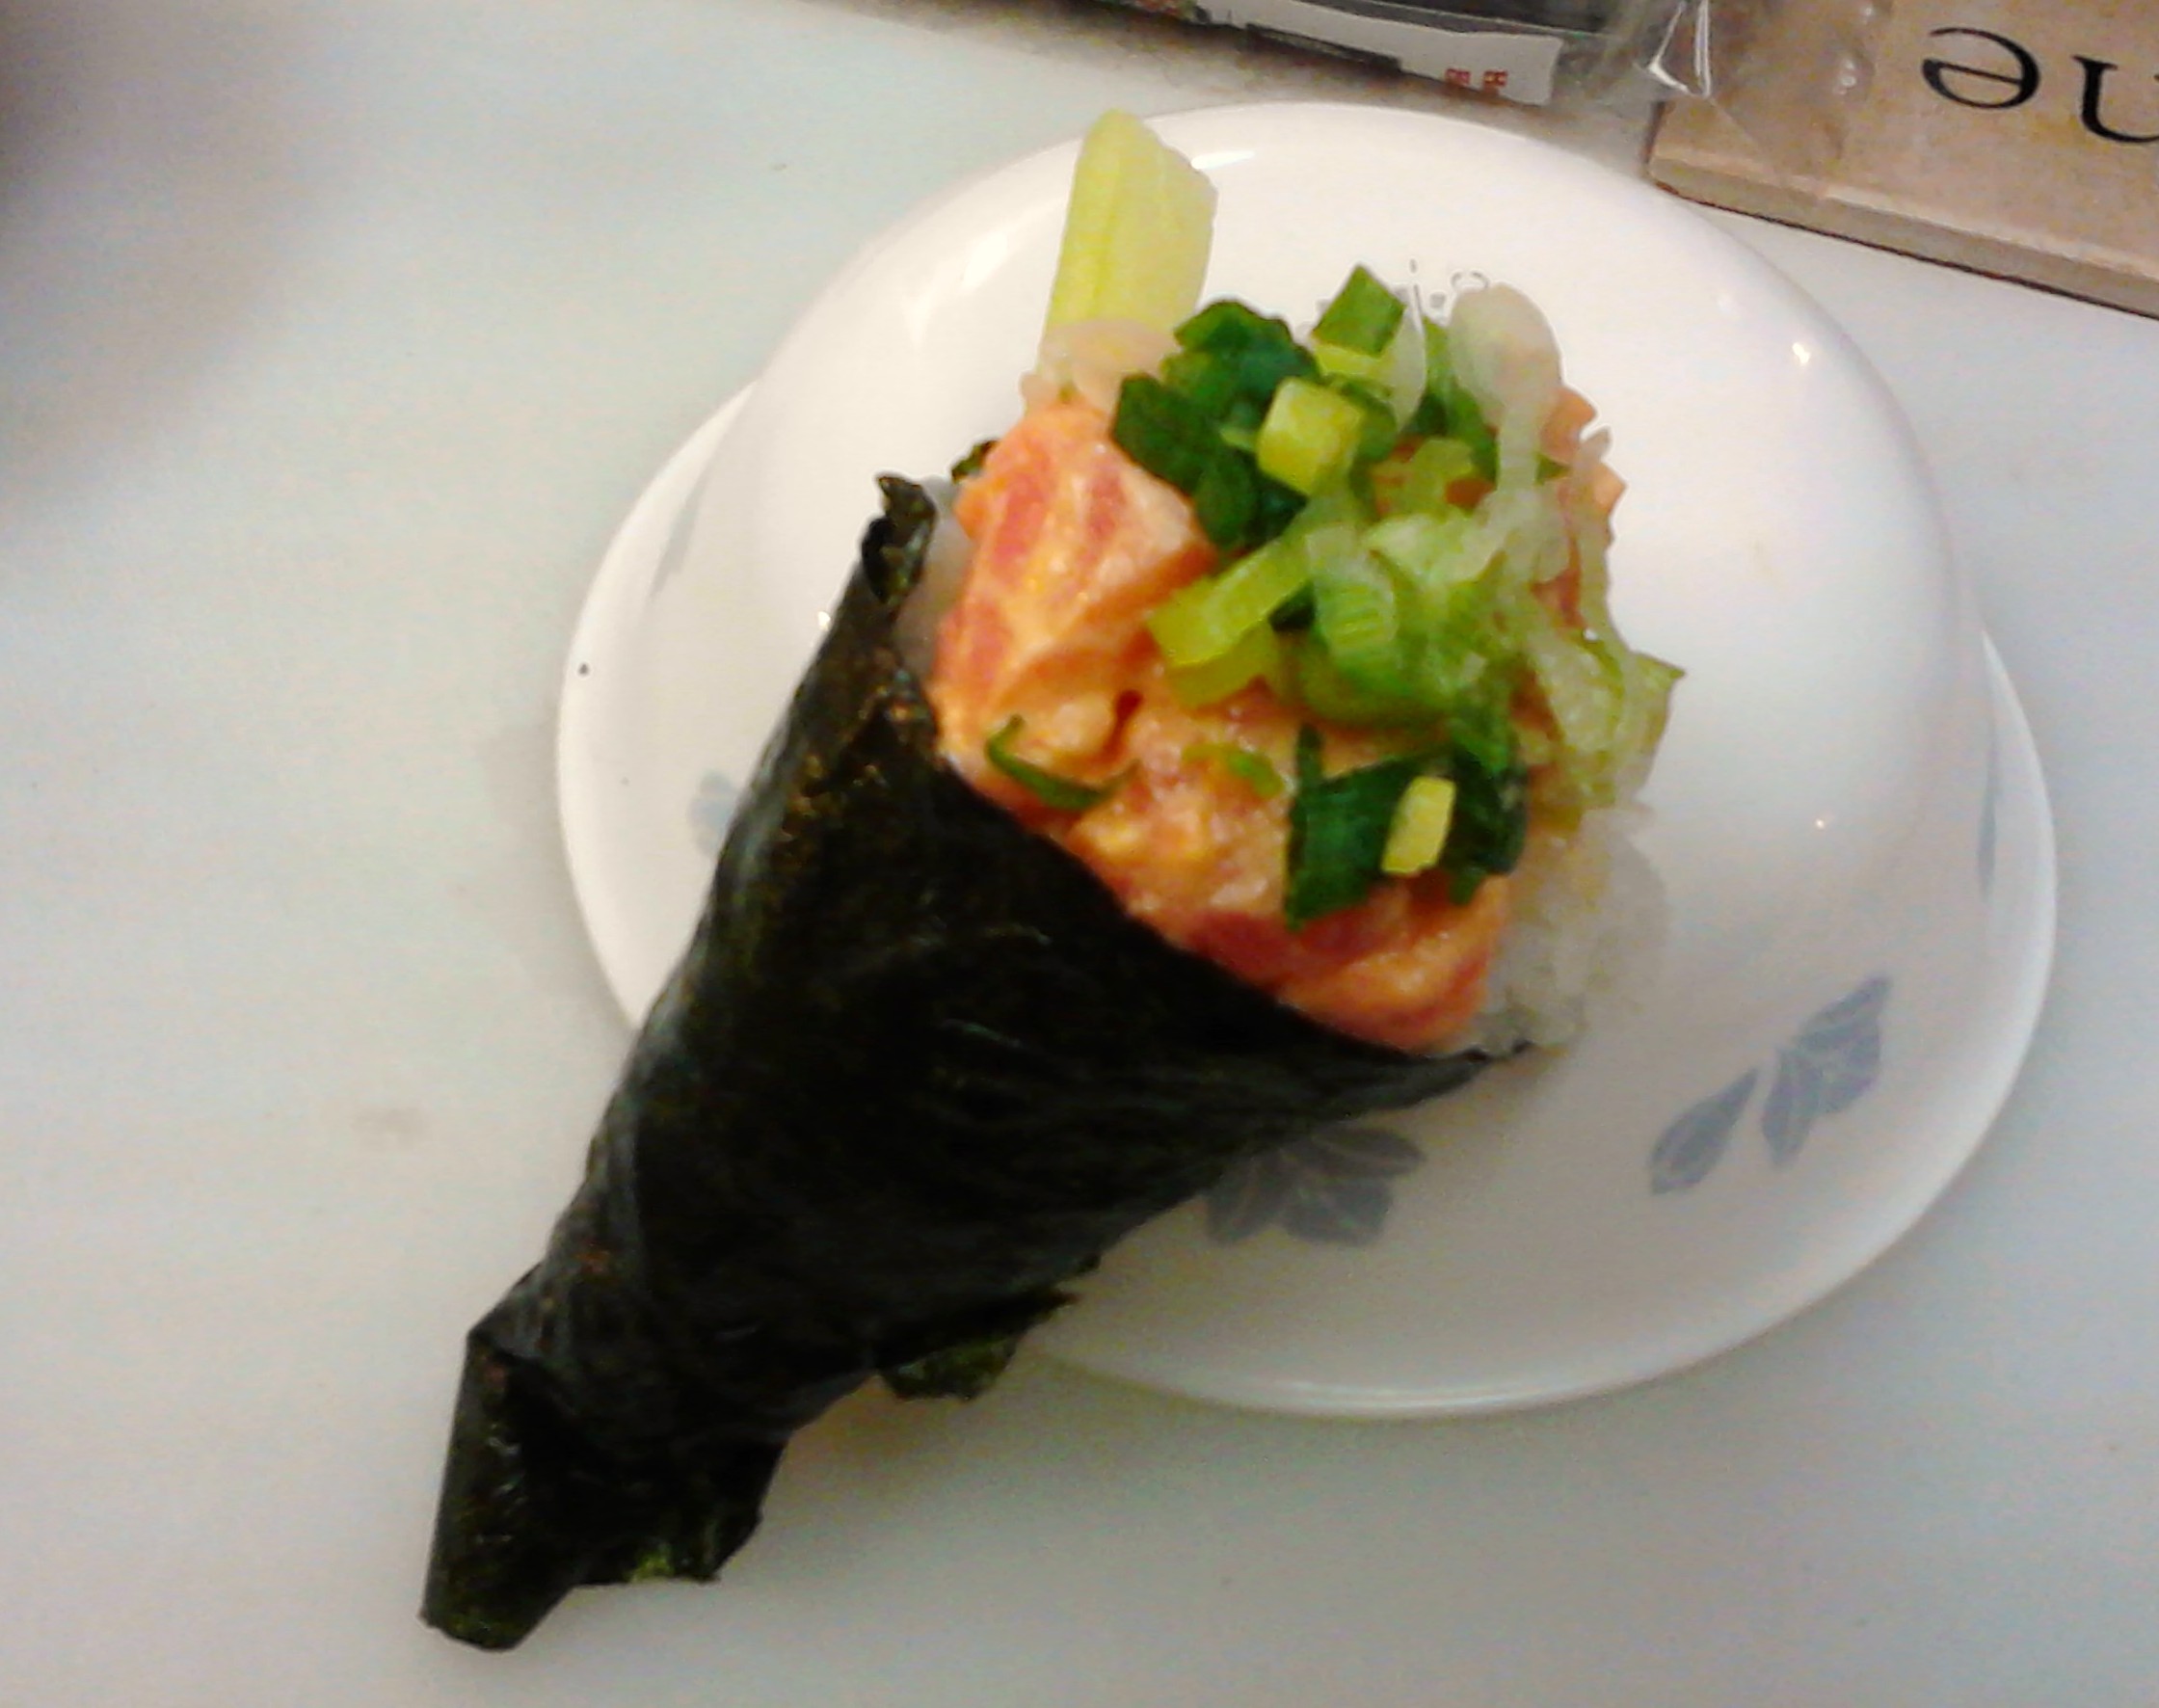
If you don’t know by now, there are all forms of Sushi Rolls, and these days, every bar out there pretty much makes up their own rolls.  Sure there are many traditional’s with the same basic ingredients, but there always seems to be a little tweak here and there in the way they’re prepared.  I never have the same roll made exactly the same at different restaurants.  But one thing I have found, is that any true not in it for the hype Sushi lover, will order Sushi Hand Rolls.  So breaking it down simply, I’ve chosen the Spicy Tuna Hand Roll to demonstrate how easy this can be for you to do on your own at home.

Sushi Ingredients

1 Ahi Tuna Steak
1 cup Sushi Rice
1 Green Onion (chopped scallions)
1/4 Sliced Cucumber
1/4 cup Mayo
1 tsp Sriracha (rooster sauce)
6 Half Sheets of Nori (seaweed)

Spicy Mayo Mix is just combining the Mayonnaise and Sriracha rooster sauce.

IMG_20131214_225444

All good Sushi boils down to proper preparation of the rice.  It is said that most chefs wash rice for months and sometimes years before they are ever trained to cut and roll sushi.  The rice must be properly rinsed and washed, soaked, then brought to a boil, reduced to a simmer for twenty minutes, cooled, then mixed with salt, sugar and rice vinegar.  The mixture and recipe for perfect Sushi rice can be found all over the web if you want a professional opinion from a Sushi Chef.  Just know that if you decide to skip this step, or even purchase the wrong rice, the flavor of your rolls will MOST DEFINITELY suffer.

Sushi Hand Roll Instructions

1) Lay down the Nori smooth side down, texture side up, length wise left to right.
2) Wet your hands with water and grab 1/3 cup of Sushi rice.
3) Place the rice in the center of the left hand side of the Nori and press diagonally from the top corner until the rice is 3/8″ thick.
4) Make a Diagonal indention in the rice by pressing your index finger in the center of the rice, then garnish with cucumber.
5) Then spread one heaping tbs of spicy tuna over the cucumber leaving the bulk towards the top left corner.
6) Using two hands, pull the Nori to the edge of the table with the right hand, then use your left hand to catch the rice side.
7) With your right hand, roll the rice side first starting with the bottom corner of the Nori, rolling over the rice in a funnel like fashion.  Make sure that the bottom of the roll goes to a point as you turn the roll in your left hand, leaving the top exposed like an ice cream cone.  Continue all the way around until you reach the last corner from the end of the Nori.  Stop there and place one or two pieces of rice on the corner and close the remaining Nori to the roll by sticking the rice corner to the cone.
8) Top off the Spicy Tuna with Scallions and Tempura crumbs if you’ve got them.  Enjoy your Sushi Hand Roll and be sure to check out my Yakitori Chicken!

I’m a Pasta Fanatic… Aren’t You?

61VnBAoAoWL._SL1000_How Hard Can It Be

If you’re not eating fresh pasta YOU ARE CRAZY!  Especially for the simple reason that it’s incredibly easy to make; not to mention the, “I can’t get enough fresh pasta” taste it leaves in your mouth after you’ve tossed the noodles in your favorite sauce.  I had someone comment on my homemade pasta video a while back.  They were so thankful for my simple little recipe.  This person even went out and bought a little hand churned Pasta maker for like $20 or $30 bucks and mentioned that they were going to start cranking’ that dough out so they could even stalk up the freezer and have it ready to go down the road.

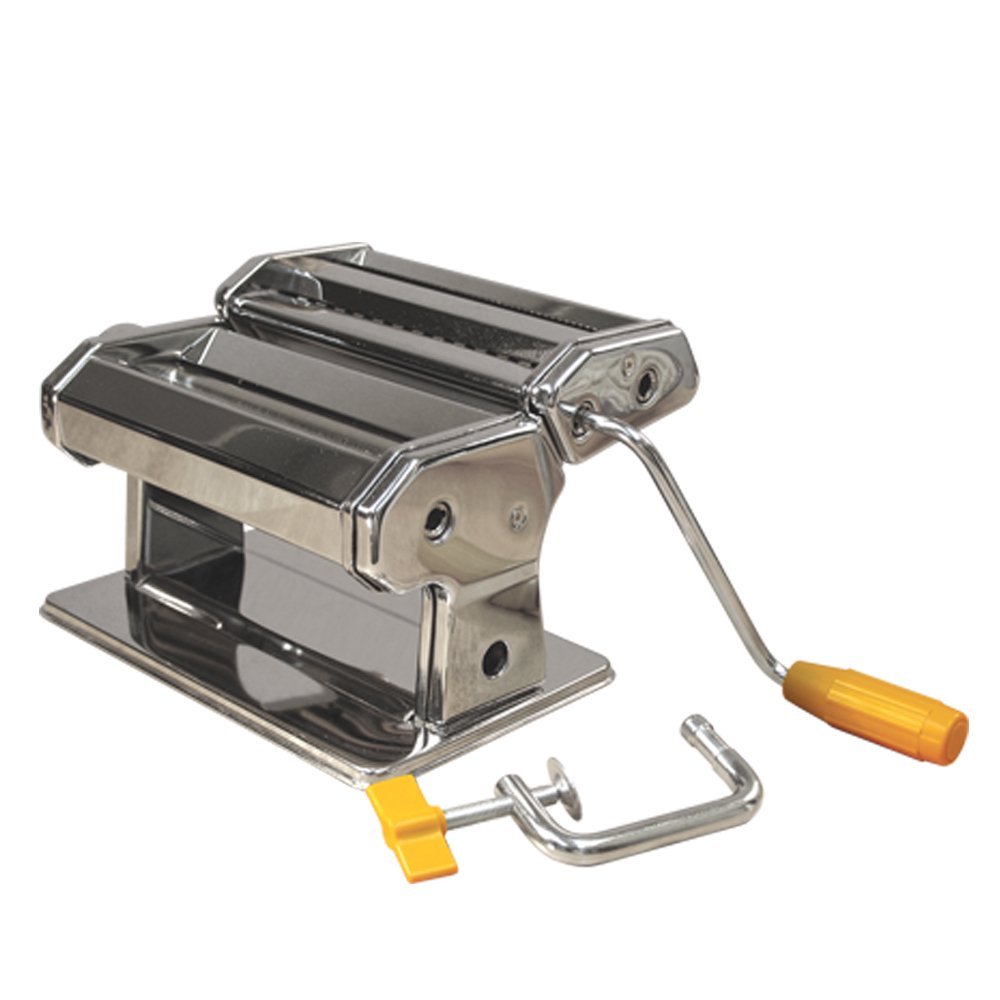
So let’s talk about it shall we?  As you can see in this photo, I’ve got a pasta maker.  It’s been sitting in my storage unit for a while because I’ve been on the road working lately, BUT, was able to pull it out recently and grace my family with a few dishes that involved some freshly made egg noodles.  It doesn’t matter what you decide to make, whether it be Italian, Greek or some twist of your favorite Asian noodle dish, but one thing is for certain, if you’re pasta isn’t the right consistency, you are going to make a mess!  Now this isn’t a contradiction to my theory that pasta is incredibly easy to make, NO!  All I’m saying is, like anything else, you’ve just got to do it right!

You don’t have to follow my recipe by any means but I’ve laid out a basic instructional video for those of you that aren’t too familiar with making your own noodles and in fact don’t have any fancy gadgets or gizmos to “Get’R done”!  The most important thing to know are two simple steps for the final outcome.  ONE, make the dough Dense.  TWO, when the dough is rolled out for the slicing of the noodles, make absolutely sure the dough is dusted with flour and dry enough to separate; otherwise you’ll have a sticky mess.   Easy enough right?  Now watch this video and you’ll see just how easy it really is from any Poor Man’s Gourmet Kitchen!

The Full written original recipe can be found here http://poormansgourmetkitchen.com/making-fresh-pasta-from-scratch.html

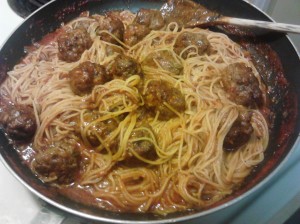
Spaghetti with Angel Hair Pasta

IMG_20121112_171626

IMG_20121112_171106


Just the Basics

This is one of the best Spaghetti dish’s I’ve ever had. The secret is in the simmer. You’ve got to let this baby reduce and get the most flavors you’ve ever loved from your favorite Italian seasonings, sink in and settle like little bombs for your taste buds to explode when they hit your tongue!

The meatballs are entirely another matter however and they are just as explosive. But, it’s something I haven’t decided to share with the rest of the world yet, and quite honestly I’ve misplaced my recipe’s “Exact” ingredients, so I’m sorry to say you’ll have to work with another recipe if you’re wanting Meatballs. In the meantime you can brown some Italian sausage and hamburger mix if you’d like to keep it simple and Americanized. I promise you it will be, almost as good! 😉

1/2 small onion, chopped (optional)
1 1/2-2 garlic cloves, minced
1 (14 ounce) can diced tomatoes
2 (3 ounce) cans tomato paste
2 (7 1/2 ounce) cans tomato sauce
1 cup beef stock or bouillon (for a long period of simmering for flavors to meld. If you don’t want to simmer it as long, add less)
1 1/2 teaspoons basil
1 teaspoon dried parsley flakes
1 heaping tablespoon brown sugar
1/2 teaspoon salt
1/8-1/4 teaspoon crushed red pepper flakes
1/8 teaspoon fresh coarse ground black pepper
1/4 cup red wine (a good Cabernet!)
1/2 lb Angel Hair Pasta
1/2 to taste parmesan cheese

Directions:
1 Add onions and continue to cook, stirring occasionally until onions are softened.
2 Add garlic, tomatoes, tomato paste, tomato sauce and beef stock (bouillon).
3 Add basil, parsley, brown sugar, salt, crushed red pepper, and black pepper.
4 Stir well and barely bring to a boil.
5 Stir in red wine.
6 Simmer on low, stirring frequently for at least an hour. A longer simmer makes for a better sauce, just be careful not to let it burn!
7 Cook the Angel Hair pasta Al dente. (This means under cook them and strain)
8 Add the pasta to the sauce and let it soak up the remaining liquid as it reduces, stirring frequently.
When the runniness is gone from the liquid, serve.