Hasselback Potatoes

Hasselback Potato with Romano Cheese and Chives.

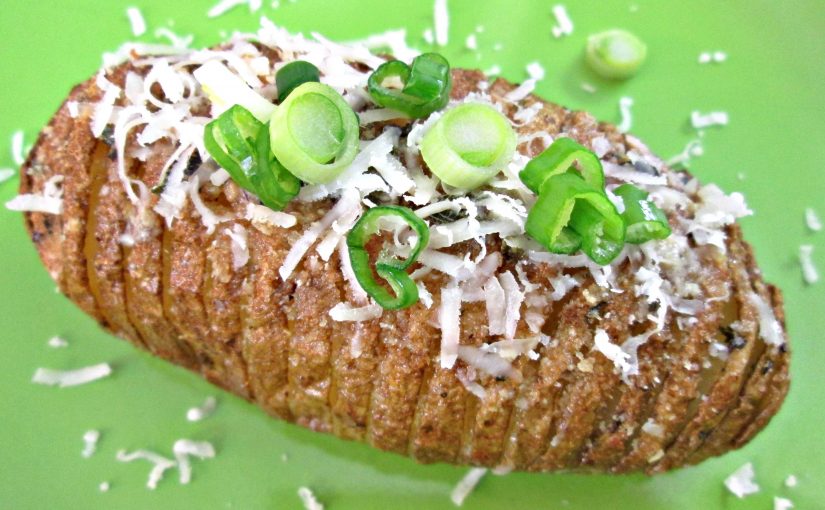
The Best Hasselback Potatoes

If you’re a fan of a classic or salted baked potato, you’re going to love this dish. Hasselback Potatoes are believed to have derived from the Hasselbacken hotel and restaurant in Stockholm, Sweden in the 1700’s and have long been a traditional Swedish dish, since. Much like Twice Baked Potatoes, all a Hasselback Potato really is is an over the top fancy baked potato. Only, Hasselbacks have thinly sliced ridges, seasoned with butter, herbs, bread crumbs and various cheeses. Of course, you can do whatever you want but I’m going to show you a few ways that I like to prepare them and the easiest way to cut those ridges.

Idaho Russet Potatoes.

Idaho Russet Potatoes

It’s a no-brainer when it comes to making Hasselback potatoes that you should use a classic Idaho Russet Potato. These potatoes can grow longer than the length of your hand and smaller than your fist so, it’s up to you which size you want to work with. I usually just work with what I have and choose potatoes that are all similar in size. Variety, however can be good if you’re serving adults and children with different appetites. The point is, Russet Potatoes should be your “go-to” of choice but, use what you have.

Russet Potato, cutting knife and a metal skewer.

The Cutting Secret

A quick search on the web will show you all kinds of deluded ways of cutting a Hasselback Potato. The trick is to cut thinly sliced vertical ridges, an 8th inch apart, all the way down the length of the potato, without cutting all the way through the bottom of the spud. This means the potato needs to remain still and in the same position.

The best way that I have found to accomplish this task, with efficiency and speed, is to to cut a flat spot, on the bottom of the potato and use a skewer. The flat spot keeps the potato from rolling and the skewer stops the blade from reaching the bottom. Wooden Skewers don’t work as well as metal skewers because they’re harder to penetrate the spud and they often break with applied force. The metal skewers, however, slide right through with ease so, I recommend using them instead. I found mine at the dollar store for dirt cheap, fyi.

Making your slices isn’t very complicated. Just be careful, use a sharp knife and cut each ridge an eight inch apart, like I show you how to do in the video tutorial.

Raw cut russet potatoes.
Baking and Preperation

Once you’ve got all of your russet potatoes cut, you need to rub them with vegetable oil. You season the outside with Kosher Salt and Pepper if you’d like but I like to do it after the first bake. These potatoes will bake at a higher temp first, for 20 minutes, then bake longer at a lower temp. There’s also some butter and herbs that can be used to baste the potatoes while the cook and I show you how to do that in the video tutorial as well.

You can bake the classic version, which I show you how to prepare first, or you can add other toppings, much like a baked potato or you can even poor a gravy over the top. It’s up to you. Let you’re imagination run wild and have fun with this recipe.

Hasselback Potatoes – The Cutting Secret by poormansgourmet.
Hasselback Potatoes Ingredients:

6 Potatoes
1 cube Butter, melted
1 clove Garlic
1 sprig Thyme
1 sprig Rosemary
1 pinch Mexican Oregano
2 tbsp Vegetable Oil
1/4 cup Bread Crumbs, optional
1/4 cup Romano Cheese
1 Green Onion, chopped
Kosher Salt and Pepper to taste

Cut and cover potatoes with vegetable oil. Bake 20 minutes 425° Fahrenheit. Brush with Butter mix and bake again for 45 minutes at 350° F.
Add more butter mix, bread crumbs and bake for 10 more minutes. Then add butter again and Parmesan cheese before serving and any other toppings you might like.

National Potato Chips and National Chips and Dip Day

PMGK’s Clap Dip

The History of Potato Chips

National Potato Chips Day is celebrated each year on March 14th. There is a fun story behind the invention of the Potato Chip and even an exact date that it was created. The first Potato Chip was made on August 24, 1853. Native American Chef, George Crum created the Potato chip in his restaurant the Moon Lake Lodge in Saratoga Springs, New York. An angry customer sent back his french fries say thing were too thick and soggy. In annoyance with the customer Chef Crum sliced them paper thin, over salted them and deep fried them to a crisp. When it was served to the customer he loved it. Others started asking for it as well. For many years it was know as the Saratoga Chip and now is Americas #1 snack food.

Our Families Favorite

Chips and Sour Cream

One of our family favorites is Cheddar and Sour Cream Chips dipped in sour cream. PMGK introduced us to dipping them in plain sour cream and the kids instantly fell in love. My five year old opened the fridge today looking for a snack and said, “Why do we have sour cream and no chips”! I have to be better at keeping us stocked up on these because no one is happy when they go for them and we are out.

Holiday Cheese Ball

Chips and Dip

While we’re talking about Potato Chips I’d like to mention that March 23 is National Chips and Dip Day. PMGK made me the best cheese ball dip over the holidays. I have been asking him to film this for a while. It is so good. I love to buy these for Christmas and New Years but I knew my husband could make them better and I was right. Maybe you can persuade him to film it for us all by heading on over to our Patreon and making a request. He has however, filmed many of my favorite dip recipes already. They are: Clam Dip, Jalapeno Popper Dip, Spinach and Artichoke Dip, Chili Con Queso and Broccoli and Cheese Dip with Marinated Artichoke Hearts.

Give me a fountain drink and a bag of Salt and Vinegar Chips and I am one happy lady.

Flavored Chips

Salt and Vinegar chips were the first chip flavor to be created. They are my absolute favorite and have been since I was about 12 years old. I used to walk to the corner market and pick up a bag and a fountain drink and come home and sometimes eat the whole bag in one sitting. I loved them that much. I don’t know any one who doesn’t like chips. Even my healthy friends buy their vegan bags of chips from the health food store. Maybe now that we’ve shared with you some of our favorites you’re ready to go out and grab yourself a snack.

Pork Rinds

The Best Pork Rinds

Truthfully, making Pork Rinds isn’t all that difficult to do but it is quite a time consuming process and one that you might rather avoid if you don’t mind buying a bag of fried pig skins or cracklings, instead.  I say that, mostly, because you don’t save any money, doing it yourself, and cooking these fresh doesn’t seem to improve the taste or flavor, in my opinion.  I like to eat Pork Rinds as much as anyone, so don’t take my thoughts the wrong way.  Just know that I’d rather just buy a premade bag instead of making them myself, next time(unless I have skin I don’t want to go to waste).  So if nothing else, you can at least learn how it’s done and hopefully enjoy this post, recipe and the work I put in to making the Pork Rinds video.

Purchasing Skins for Pork Rinds

As you can see, in the photo above, I purchased my Skins, to make Pork Rinds, from my local Asian Market.  Skins usually come from the Belly side of the pig, where the the bacon is removed.  So there’s generally a ton of fat associated with the cuts.  I paid $2 dollars a pound, for this package, so I didn’t really save any money vs. buying a premade bag of Pork Rinds.  But, because the fat was already removed I didn’t get charged for all the extra weight.  Though, I’m sure if it were still attached, the price would’ve been altered accordingly.  Regardless, you should be able to purchase pig skin from any butcher that sells pork.

Making Pork Rinds

As I mentioned before, making Pork Rinds is time consuming and quite tedious.  Even though the majority of the fat content was removed from the skins, the skin needs to be boiled and scraped to ensure that all of the fat is gone.  And it’s best to boil the skins whole, before cutting and slicing them into portions.  This way you can do it in large sheets instead of individual 1 inch pieces.  Removing the fat, completely, helps to aerate the skin when it bakes and helps the Rinds fluff up more when they’re frying.  In the video, I Boil the Pork Rinds for 30 minutes, strain and then baked them, on low, for approximately 4 hours before frying.  Then once they are removed from the oven, they can be dropped in a deep fryer set at 350 degrees Fahrenheit, for 2 minutes.

Fried Pork Rinds

A few things you need to consider, when making Pork Rinds, is that there are several different ways you can screw these up.  If you’ve ever bitten into a pork rind that just about broke your tooth or was just too hard to chew, then you need to pay attention to a few things.  First, cut off tough and discolored edges that seem dried out and pleathery.  Second, again, be sure to scrape out the fat.  And third, be sure to remove all of the pieces that that didn’t puff up in the fryer.  You follow those three easy steps and all of your teeth will stay intact.

As far as seasonings go, anything with onion and garlic powder in them is generally a good way to go but you can use ranch powder, adobo, pico de gallo or just plain old salt and pepper.

Pork Rinds Ingredients:

2 lbs Pig Skin
2 Quarts Water
1/4 cup Salt
Oil for Frying
You’re Favorite Seasoning

Be sure to remove all of the fat from the skin, boil the skin for 30 minutes, bake the skins on low for 2 to 4 hours and
deep fry the skins at 350 degrees Fahrenheit for approximately 2 minutes. Place the Pork Rinds on paper towels and
season with your favorite seasoning or salt.